Baby Food With Plums - Easy Baby-Led Plum Bar Recipe
Table of Contents
Do You Always Have Leftover Plums?
If you find yourself consistently having leftover plums, consider incorporating them into recipes for baby-led weaning (BLW).
These juicy and sweet fruits can be mashed and added to oatmeal or yogurt for a delicious and nutritious simple recipe with plums for your little one.
Plums can be baked into soft and tender muffins or pancakes, providing a tasty and wholesome finger food for BLW.
By incorporating leftover plums into these BLW-friendly recipes, you can minimise food waste while introducing babies and older babies to new flavours and textures in a fun and interactive way.
The Different Types Of Plums
The variety of plums, each with its own unique flavour, texture, and colour. Some common types include yellow plums, Japanese plums, Santa Rosa, European plums, and an Italian plum.
The plum variety can vary in sweetness, tartness, and juicy flesh, providing a wide range of options for incorporating them into baby-led weaning (BLW) recipes.
Plums are not only a small fruit/juicy fruit but also highly nutritious with health benefits such as vitamin c, with antioxidant properties making them an excellent choice for BLW.
Their firm flesh and sweet taste make them suitable for mashing or steaming to create simple purees or finger foods for your little one. Whether served on its own as a soft, mashed fruit or incorporated into oatmeal, yogurt, or baked goods, the type of plum can be a wonderful addition to a baby's diet during the BLW journey.
How To Use Plums?
Plums are a versatile fruit that can be incorporated into a variety of baby-led weaning (BLW) friendly recipes.
One delicious option is to create homemade plum jam, which can be served on its own or mixed with yogurt to create a smooth and nutritious snack.
Another idea is to incorporate finely chopped or mashed plums into oatmeal to add natural sweetness and extra fibre. Additionally, plums can be used to make soft, ice cream or plum crumble suitable for baby-led weaning by pureeing or finely dicing the fruit and adding it to the ice cream or crumble.
By exploring these options, parents can introduce their little ones to the wonderful flavour of stone fruits while providing essential nutrients and encouraging exploration of different textures.
Why You Should Make The Recipe?
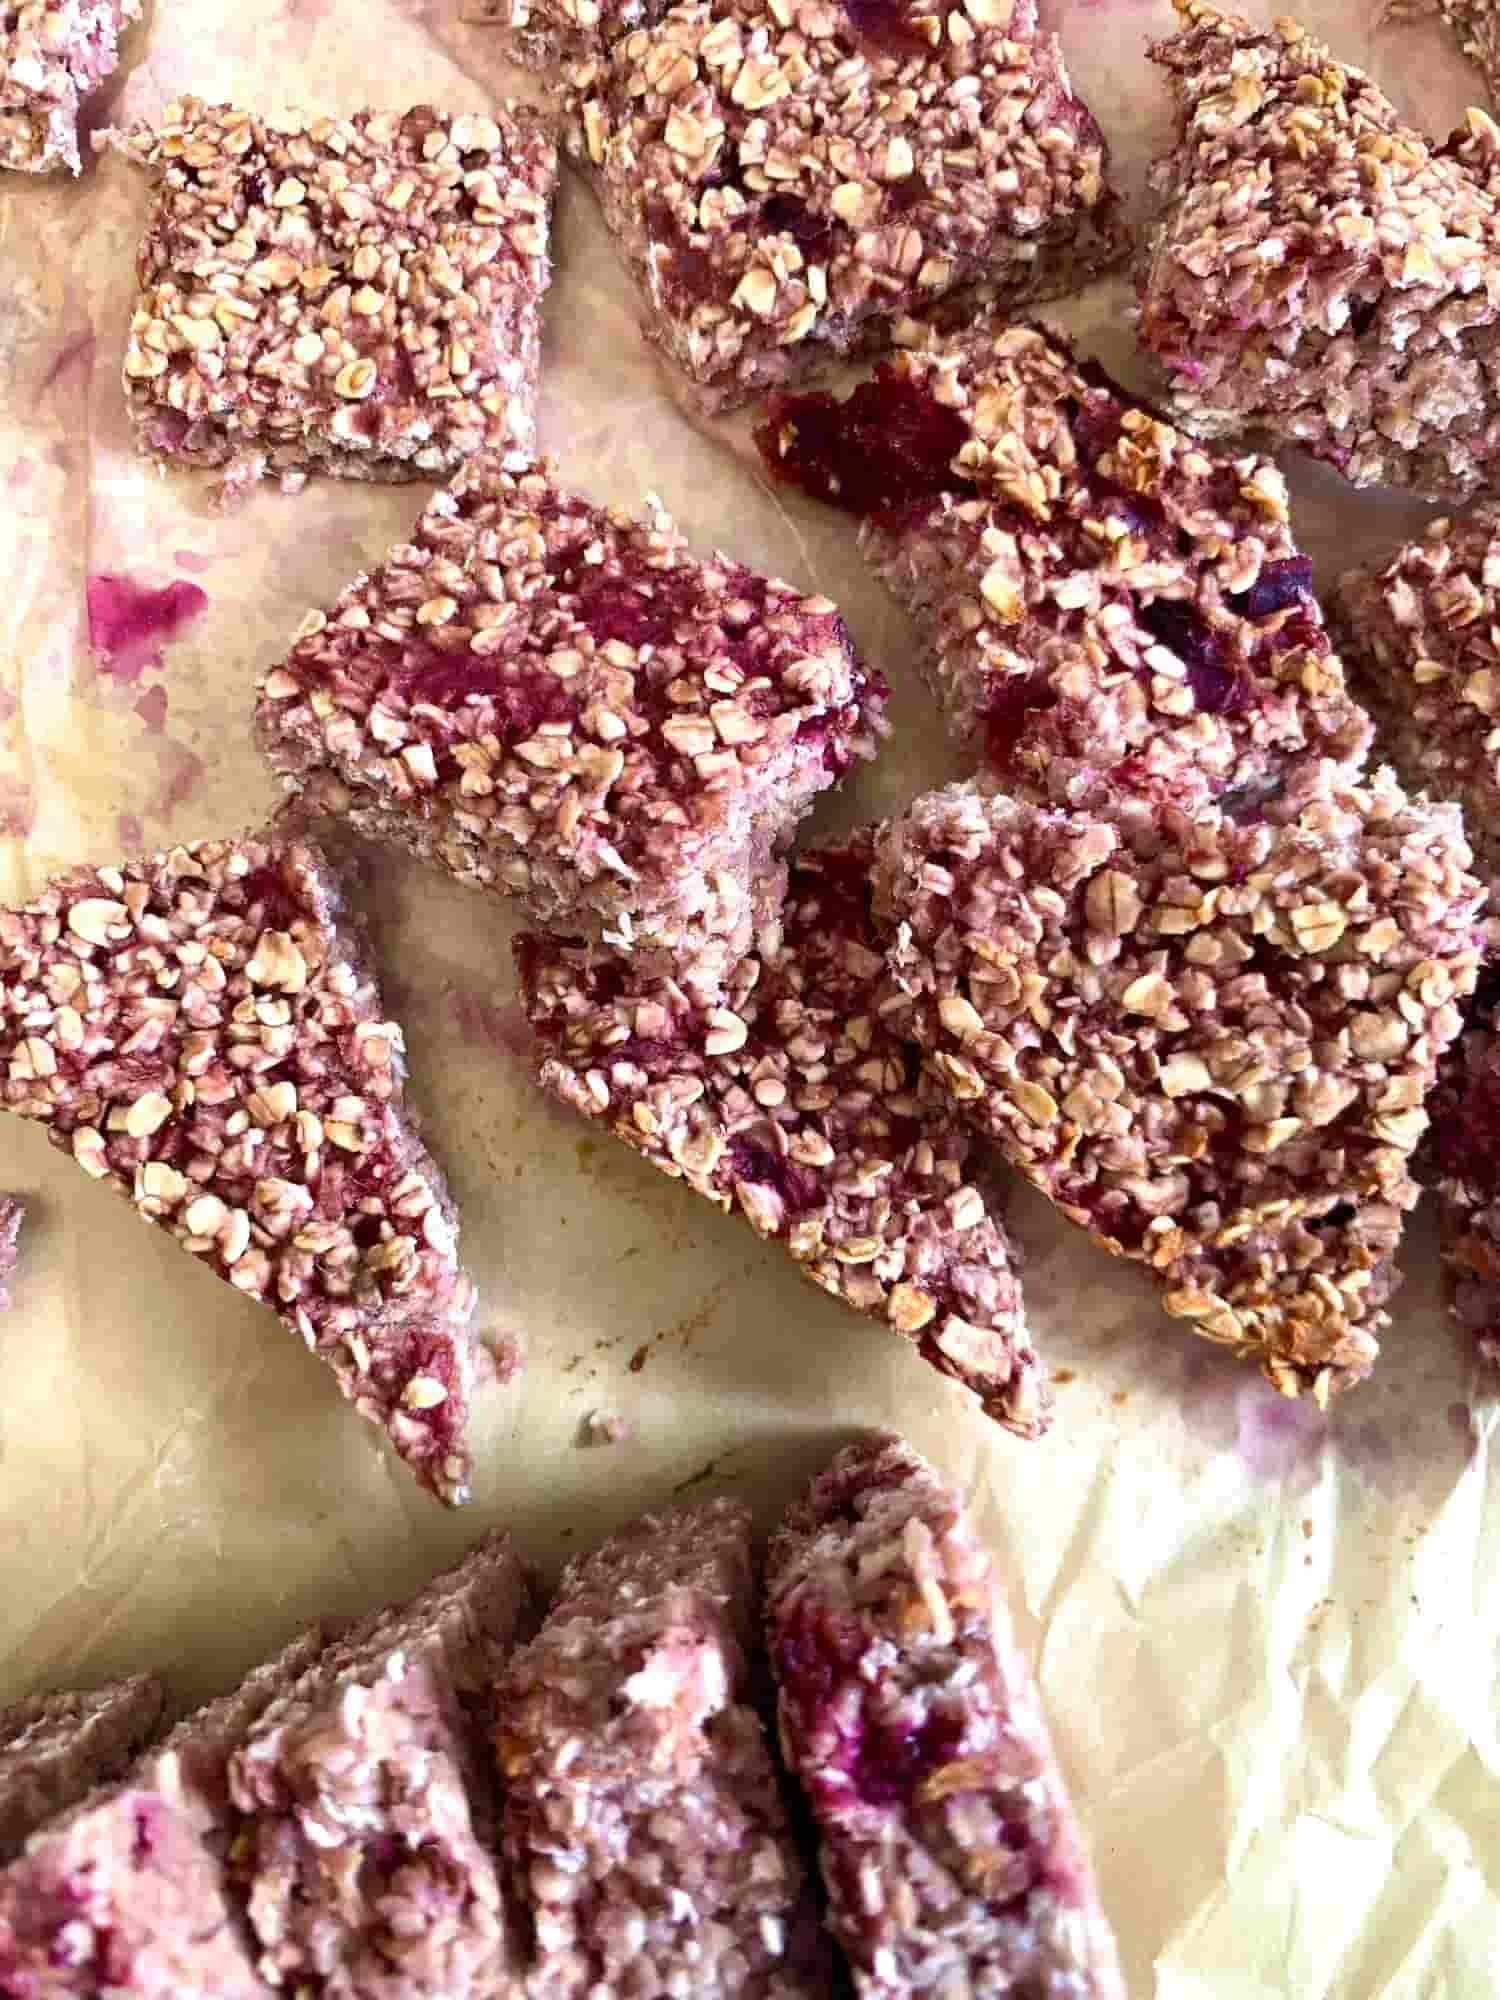
Looking for a delicious homemade baby food snack that you can take on the go? Our easy plum bars are the perfect solution! These delectable bars are made with an oaty base and a sweet, juicy plum filling that bursts with flavour in every bite.
Whether you're heading to work, school, or just running errands, these portable treats are the ideal grab-and-go snack to satisfy your kids sweet tooth.
Simply wrap them up individually, and you'll have a convenient and tasty snack that's ready whenever hunger strikes. Enjoy the delightful combination of oats and luscious plum filling while juggling everything that day.
This recipe can be adapted if you wanted to add in or takeaway the plums to add in your choice of fruit, it’s great to use this recipe if you have any leftover fruit!
The recipe is literally a case of mixing all the ingredients together once the plums have been cooked! How simple is that!
Ingredient information
Fresh plum - I have chosen plums as the sweetened base for this recipe as I had lots of leftover plums that were very ripe! You could use other fruits if you wanted to! Just be careful the hard pit has been fully removed. You could make the plums into a plum puree too to make a great plum baby food.
Egg - I have used a free range egg, this acts as a good binder for the slices.
Oats - Oats are great as part of yours and your babies diet! You could grind the oats to make a powder for a smoother texture for your baby if you wish.
Baking powder - I have added some baking powder so the slices rise slightly.
Ground ginger - This is optional, but I think plum and ginger work well together but understand it’s not to everyone’s taste.
Serving suggestion
These bars are great served on their own from 6 months of age.
They are a great snack, on the go or at home! Not only that they can be a snack for the whole family! Keep them in the fridge for a snack when you may need!
Not only that they are inexpensive to make! Win win!
Other baby food recipes you may like: Oaty bars, Lemon raspberry bars or Breakfast bars for baby.
Storage instructions
Once cooled and at room temperature, you can store the bars in airtight containers large or small, in the fridge for up to 5 days.
The bars can be stored in airtight containers or freezer bags and kept in the freezer for up to 3 months. Great for bringing out when you need them!
To defrost from the freezer, leave the bars in the fridge overnight.
Equipment used to help with this recipe
Airtight containers are key for keeping the freshness locked in! Also I find using bag clips, for the grease proof paper helps to keep it in place before I add the filling to any dish before baking! I also use a 9x9 inch baking tin (metal, non-stick and heavy duty), which is great for all bakes!
As an Amazon Associate, I earn commission from qualifying purchases.
Recipe | Baby Food With Plums - Easy Baby-Led Plum Bar Recipe


Baby Food With Plums - Easy Baby-Led Plum Bar Recipe
These are so delicious and a great recipe if you have any leftover plums to use up. Great for baby-led weaning and toddlers.
Ingredients
Instructions
- Start by pre heating your oven to 180C or 350F, and lining a 9x9 inch dish with baking parchment. I use some bag clips to keep the paper in the dish and in one place.
- Pop the halved plums (with the skin on) in a small saucepan and add a dash of water.
- On a medium heat, cook the plums in the water covered with a lid for 15-20 minutes.
- The plums should be really soft when done. Mash them using a fork. Leave to stand for at least 10 minutes.
- Add in the oats, baking powder, ginger and egg to a large mixing bowl.
- Add in the plums and mix everything together.
- Pop the oaty mixture in the lined dish and press down using the back of a fork so it is even in the dish.
- Remove the clips if using and pop in the oven for 20 minutes.
- Leave to cool and cut into squares or fingers.
Notes
Other fruits you can use instead of plums, are strawberries, apple, nectarine, peach! Or a combination of fruits and spices that you really enjoy!
Feel free to use different plum varieties too!
If you use gluten free oats, you can be sure that this recipe is gluten free!
©The Petit Spoon
Content and photographs are copyright protected and need prior permission to use elsewhere. Copying and/or pasting full recipes to other websites and any social media is strictly prohibited. Sharing and using the link of this recipe is both encouraged and appreciated! Share this post now!


